Interested in climbing Africa’s second highest mountain? You’ve come to the right place! In the below post, I’ll detail my experience preparing for and executing a five-day guided trek up Mount Kenya. I visited in October/November of 2015.
An Intro to Mount Kenya
Mount Kenya is the second highest elevation mountain in Africa (after Tanzania’s Mount Kilimanjaro, 5,895 m / 19,341 ft) and is located in central Kenya, near the city of Nanyuki (about three hours by car from Nairobi). It’s a three-million-year-old mountain of volcanic origin, and is a sacred place to multiple tribes in the area, who believe that the mountain is where god lives.
The three highest peaks of Mount Kenya are Batian (5,199 m / 17,057 ft), Nelion (5,188m / 17,021 ft) and Point Lenana (4,985 m / 16,355 ft). Ascending Batian or Nelion requires skilled mountaineering – rock climbing and use of ropes. A trek to Point Lenana is possible as a long trek with no proper climbing, though trekkers should be at a reasonable level of physical fitness. Accordingly, the vast majority of visitors to Mt Kenya ascend as far as Point Lenana.
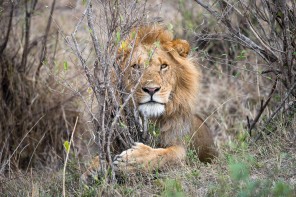
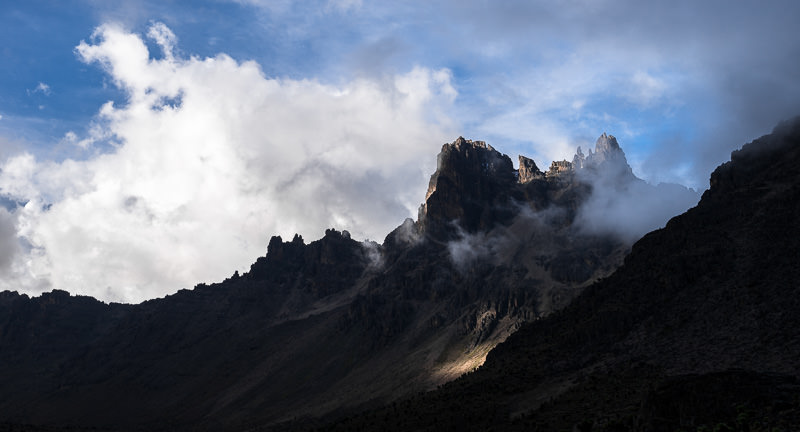
The high peaks of the mountain are craggy and dramatic, and the mountain features multiple glaciers and many deep valleys. The whole mountain is a national park too, so if you’re lucky, you may even see wildlife like elephants and other large mammals on the lower-elevation trails. In other words, it’s a great place for photography!
Climbing Mount Kenya: My Team and Basic Conditions
I contacted my Nairobi-based guide a couple of weeks before my intended trek to discuss intended trekking dates and negotiate costs (costs discussed later in this post). We agreed on a five-day itinerary on the mountain. My team was to be just a guide, a cook, and myself. No other tourists/travelers/backpackers were in my group given low tourism in Kenya in October/November of that year.
My guide, John.
Many trekkers will opt to hire a porter to carry their main backpack – I didn’t, and carried my own pack accordingly. When you make arrangements to visit Mount Kenya, make sure to ask if your group will have porters or not (and how many there will be) as this may affect daily costs of your trek. It’s true that hiring a porter will make your trek easier, especially if you’re not accustomed to trekking with a heavy pack. But if you want to earn your elevation, you can carry your own stuff.
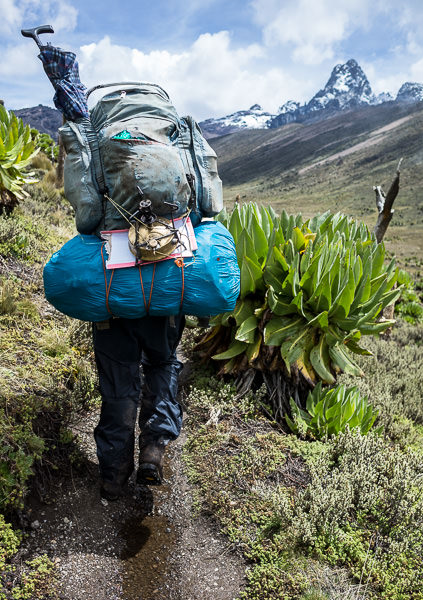
A porter carries his own pack AND a tourist’s pack, lashed to the bottom of his own! Tough as nails.
I was very happy to have a cook in our group in order to avoid needing to carry food and cooking supplies myself, though if you’re self-contained and prefer to carry/cook your own food that you can arrange that as well. Meals served by my cook were simple but nourishing and helped keep energy levels high and levels of altitude sickness low. My guide/cook were kind enough to ask me if I was a vegetarian before they shopped for our food in Nanyuki. I’m not, but that’s quite considerate of them to ask!
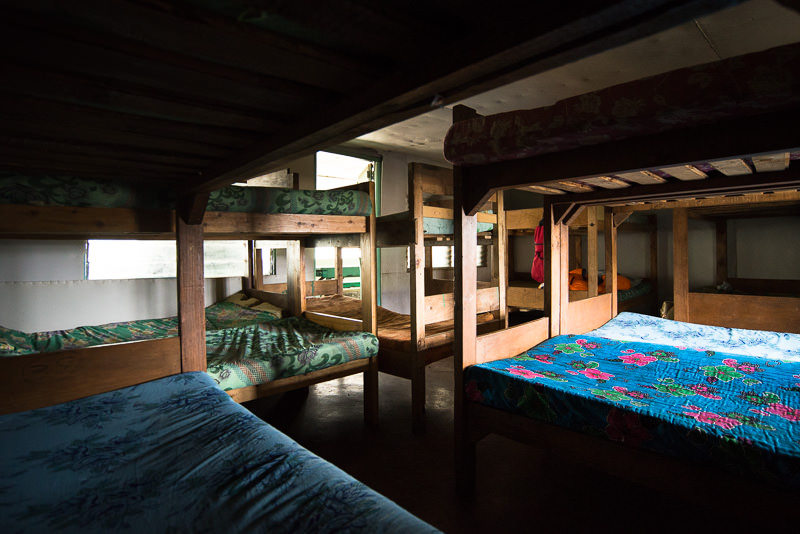
I slept in simple concrete lodges with wooden bunks and foam mattresses for each night of my trek. Many other people carried tents and camped outside the lodges. Make sure to know if you’re using the lodges or camping prior to your trek, as this may affect the way you pack for your trek, and may also affect your daily costs (I believe it’s cheaper to camp than to reserve lodge beds).
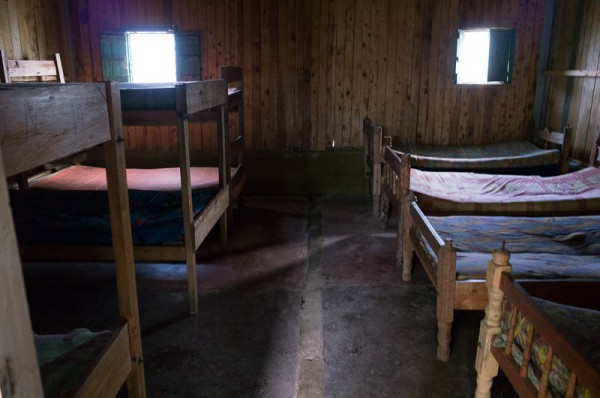
An uninspired picture of one of the rooms of bunks at one of the camps. Rooms are NOT heated and are NOT insulated, and thus get very cold at night.
If you’d rather trek independently – without a guide – know that you CAN trek without a guide in Mount Kenya National Park, provided that you are in a group of at least two people – but it’s recommended to hire a local guide, cook or porter that knows the ins and outs of the park’s routes if there are any questions of your preparedness. Signage in the park is limited and getting lost there wouldn’t be an impossibility (not to mention that in my opinion, putting money in the hands of locals for services provided is probably the best thing you can do in any given community on a microeconomic level – so consider that too!).
Packing for Your Mount Kenya Trek
The weather can shift quickly while you’re climbing Mount Kenya, so it’s critical to pack for changing conditions, including heavy rains, intense cold and even the possibility of snow.
As of 2015/2016, I recommend trekkers bring basically EVERYTHING they need from home in order to go up Mt Kenya. There’s virtually nothing gear-wise to rent in Nanyuki town, and outdoor gear in Nairobi is both more expensive and lower grade than you’ll find in stores in places like the US or Europe. So come prepared.
Here’s what you should pack for your trek, provided that you’re trekking to Point Lenana (and not up Batian or Nelion – those will require additional equipment beyond what I mention here):
Backpack
- If you’re carrying your own gear, an internal frame backpack should work fine.
- If a porter is carrying your gear, you might be able to get away with putting your stuff in a duffle bag instead (talk to your guide). Also – if a porter is carrying your main bag, you’ll probably only carry a light day pack. Plan accordingly.
- Bring a waterproof pack cover that fits your backpack also. I used mine multiple times.
- I recommend carrying your clothes and sleeping bag in some kind of waterproof bag inside your pack as well – you need to make sure this stuff doesn’t get wet even if your pack does! A plastic garbage bag can work in a pinch.
Clothes
The most important rule for your clothes is that they should NOT be made of cotton, as cotton dries too slowly for trekking/mountaineering. Wool, silk, and synthetics are best. Here’s what to put in your pack:
- Waterproof hiking boots for daily use
- Additional pair of shoes to wear while you’re at camp
- 4 pairs of heavy wool trekking socks. Consider sock liners as well. NO COTTON, once again.
- 2 pairs of pants. Nice if one of them zips off to shorts. NO JEANS.
- 3-4 shirts – t-shirts or long sleeve.
- 1-2 sweaters or fleeces. Again, no cotton.
- 1 mid-layer jacket for warmth (down or synthetic insulated).
- 1 hard shell jacket for wet conditions, and for cutting wind.
- 2-4 pairs of underwear, depending on how often you actually plan to change your clothes.
- High quality base layer (long underwear) bottoms. I recommend silk or merino wool. If you buy good quality, you can just bring one. If you have low-end stuff, bring two.
- High quality base layer (long underwear) top. I recommend silk or merino wool.
- Warm hat. Possibly also a balaclava to cover your face if you prefer.
- Warm gloves.
- Sunglasses.
Other necessary gear
- Sleeping bag that’ll keep you warm at freezing temperatures. It gets REALLY cold on the mountain at night, so make sure you don’t skimp here or pick up rental gear in questionable condition. I used a high-end goose down sleeping bag and STILL found it necessary to wear my merino wool base layer and warm hat while I slept in order to stay warm!
- Water bottles – enough to carry 3L per day. You can refill your bottles at each camp. I carried a 2L water bladder, plus a 1L filtration bottle. The former requires water purification tablets. The latter makes for a basically unlimited source of purified water which you can drink instantly, which is super convenient.
- Water purification tablets. I like and use this kind.
- Headlamp. You’ll use this around camp each night, and for your summit day if you’re going up for sunrise. Consider carrying additional batteries for your headlamp, and possibly an additional bulb too. A cheap consumer headlight is fine – you don’t need the most expensive one out there.
- Two rolls of toilet paper. One will probably be enough though.
- Sunscreen. Sunlight at elevation can be quite intense.
- Lip balm.
- Other personal toiletries as needed (toothbrush, toothpaste, etc). You probably won’t be showering during your trek, so you can likely omit shampoo. Soap can be nice for occasionally washing your face. Make sure to bring anti-diarrheal pills too, just in case.
- Baby wipes. You’ll be stinky if you trek for multiple days. I’ll never trek without a packet of baby wipes again if I can help it!
- Camera (or mobile phone, if that’s your camera).
- Extra batteries for your camera and/or backup battery for your cellphone. Batteries drain faster at cold temperatures, and there’s nowhere to charge your stuff on the mountain.
- A book. There will be periods of downtime, and/or periods in which it’s so cold outside that you’ll be relegated to hiding in your sleeping bag. Bring a book to mitigate your boredom, especially if you’re trekking solo.
Optional Gear
- Snacks for periods between meals. Maybe some energy bars of some sort, or other dry snacks like nuts.
- Rehydration tablets of some sort. Not critical, but a nice touch if you tend to get dehydrated quickly. Especially nice for rehydration if you end up with travelers diarrhea on the mountain.
- Trekking poles. I brought a pair and don’t regret it, because my knees hate descents. I use poles similar to these (I’m 5’10 and chose the 110mm fixed-length poles).
- Waterproof rain pants. Some people hate these because they make their legs sweat as much as just getting rained on. Up to you.
- Leg gaiters for keeping gravel or rain out of your boots. These can be nice but aren’t required.
- Insulated “ski pants” style waterproof lowers. I see a lot of people in (for example) Mt Kilimanjaro trekking pics wearing these. I didn’t need them on Mt Kenya and don’t find them necessary. They’re generally quite bulky anyway. Layering appropriately can help you avoid needing these.
- Insect repellant. I didn’t have any problems with bugs while trekking, but a small bottle of repellant might be useful in some cases.
- Tent. If you’re sleeping in lodges for your entire trek, you probably don’t need to carry this.
- Air mattress of some sort. You probably only need this if you’re sleeping in a tent.
- Altitude sickness medication like Diamox. I didn’t take it nor find it necessary for myself, but others may opt to take medication like this to acclimatize to altitude faster. I’ve also heard stories about it making others ill, though. Talk to your doctor and make the choice that’s right for you.
Also of note: if you’re on a long trip in Africa, you can often leave personal items that are not necessary for your trek back in Nanyuki or in Nairobi in order to shed weight. Talk to your guide, or to your lodgings in the city in question.
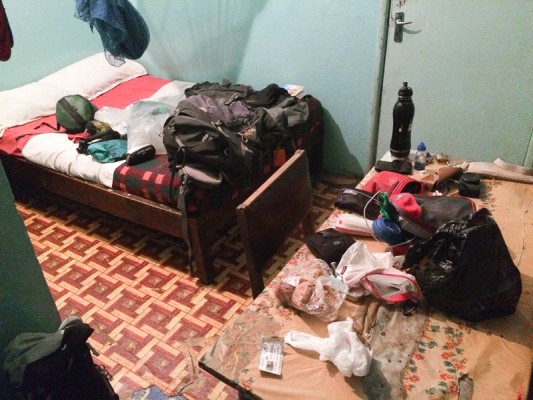
My insane re-packing process in Nairobi, prior to leaving for Mount Kenya. Took up the whole room at times.
Our Five Day Mount Kenya Trekking Itinerary
One of the classic five-day itineraries is the “Sirimon – Chogoria” route. This, known as one of the most beautiful trekking routes on Mt Kenya, was our stated plan, but thunderstorms on the Chogoria route forced us to return the way we came, down Sirimon.
No single day was terribly grueling in length nor in its altitude fluctuation. Trekking was moderate but steady and required at least a moderate level of physical fitness. Those without prior exposure to high altitude trekking (say, above 3,000m) should monitor the way they feel and trek at a pace with which they feel comfortable. Any reputable guide will have respect for this kind of pacing. The phrase you’ll hear on the mountain is “pole pole” (po-lay, po-lay) – slowly, slowly.
I walked a a slightly slower pace than most trekkers do/will, mostly due to my desire to photograph basically everything along the way. Here’s how our daily schedule broke out accordingly:
Day 1: Nairobi to Old Moses Camp
- 7:00AM – 10:00 AM – Meet with guide in Nairobi, then transit to Nanyuki by shared taxi.
- 10:00 AM – 1:00 PM – in Nanyuki, guide and cook shop for food and do final preparations for trek.
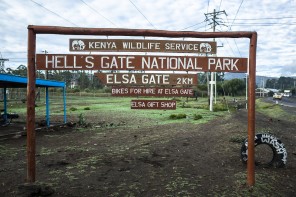
- 1:00 PM – 2:00 PM – transit from Nanyuki to Sirimon Gate (2650m) of Mount Kenya National Park
- 2:00 PM – 2:30 PM – reorganize packs at the gate
- 2:30 PM – 5:30 PM – hike from Sirimon Gate to Old Moses Camp (3300m)
To be honest, I think I expected to do more trekking on day one than we actually did. I spent most of my day in vehicles, or just standing around watching my team prepare for the trek in Nanyuki. It was kind of anti-climactic. I was a bit amped to get into the mountains early on, and it just took a long time to get there.
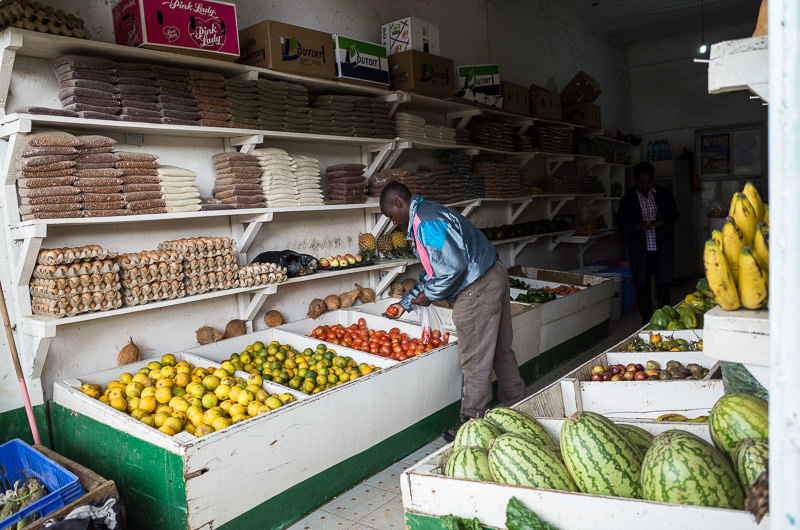
Our cook Steven shops for fruit and vegetables in Nanyuki prior to departure.

A sofa being delivered by motorbike in Nanyuki. Skills.
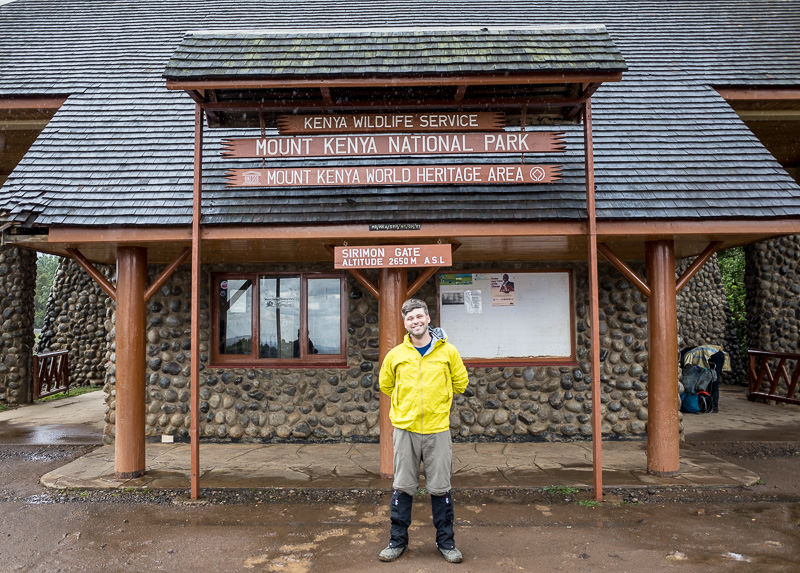
Me at the trek’s beginning, cheesing at Sirimon gate.
The hike from Sirimon Gate to Old Moses Camp isn’t particularly thrilling. Most of it occurs on paved roads or dirt roads, and there’s not a lot to see. You do stand your best chance of seeing Mount Kenya wildlife here, but I didn’t really see much. A few water buck, some baboons, a couple of zebras. Still cool, but nothing compared to game drives in places like the Maasai Mara National Reserve.
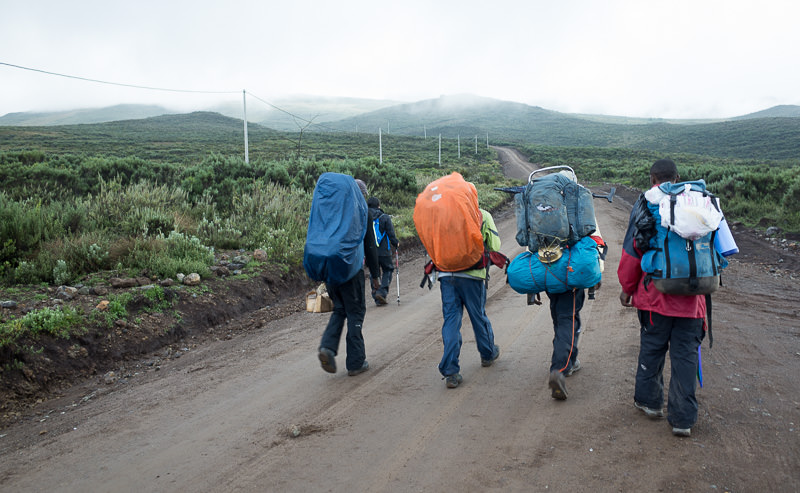
This is what the latter part of the first day’s walk looked like: a wide dirt road at an easy incline, and a lot of clouds. The other trekkers pictured are with a different group, different guide.
A point of interest on this hike: you cross the equator by foot.
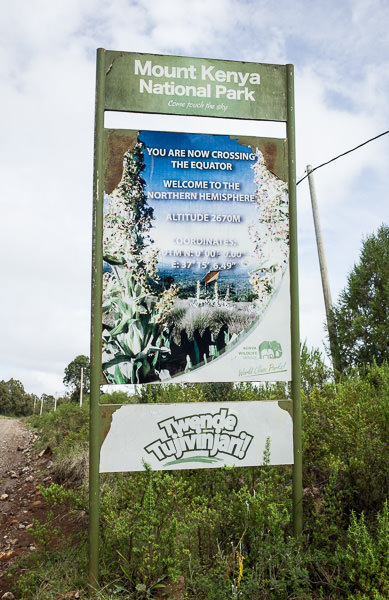
To be fair, you actually cross into the SOUTHERN hemisphere when you hike up from Sirimon gate. I shot this on the way back down.
It rained like crazy on this day – at times it was so bad that we had to hide under trees on the way to Old Moses camp several times. Most of my clothes that I was wearing were quite wet by the end of the day. It became so cold at Old Moses camp at night that my stuff didn’t fully dry overnight either.
Traffic was low at Old Moses camp, and I ended up having an entire room of about 15-20 bunks all to myself. In busy seasons, all these bunks fill up.
Day 2: Trek from Old Moses camp to Shiptons Camp
- 7:30 AM – leave Old Moses camp, trek up Sirimon valley
- 2:30 PM – arrive Shiptons Camp (4200m)
This was quite a cloudy, damp day for us, but we fortunately didn’t get hit with heavy rains. The trail was a steady incline for most of the day. Thanks to rains, some of the trails were as much puddle as they were trail.

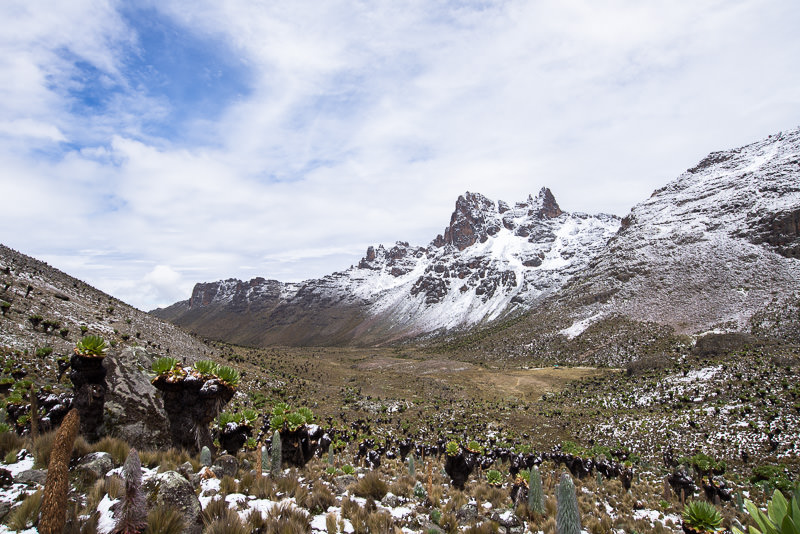
Our views of the Sirimon valley could’ve been better than they were, but so it goes. This was probably my fault, given that I wasn’t traveling safely inside Kenya’s DRY SEASON. Kenya incurs a short rainy season between October and December, just after the “dry season” of June to October.
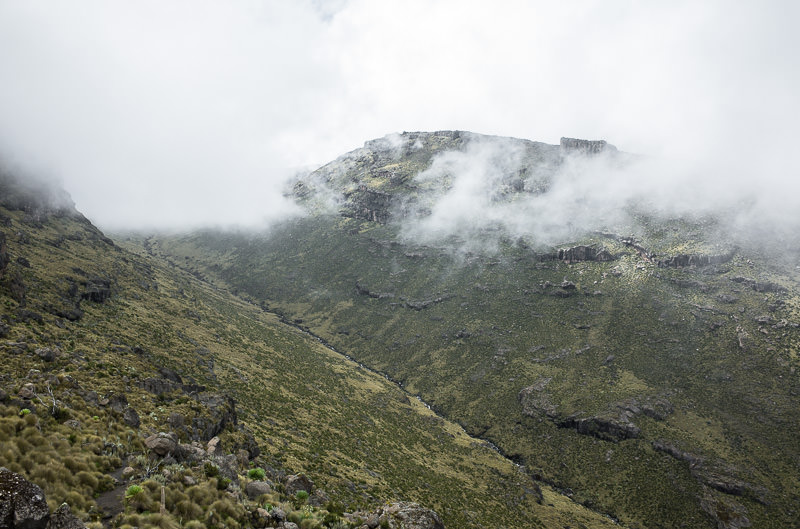
Our first look at Sirimon Valley.
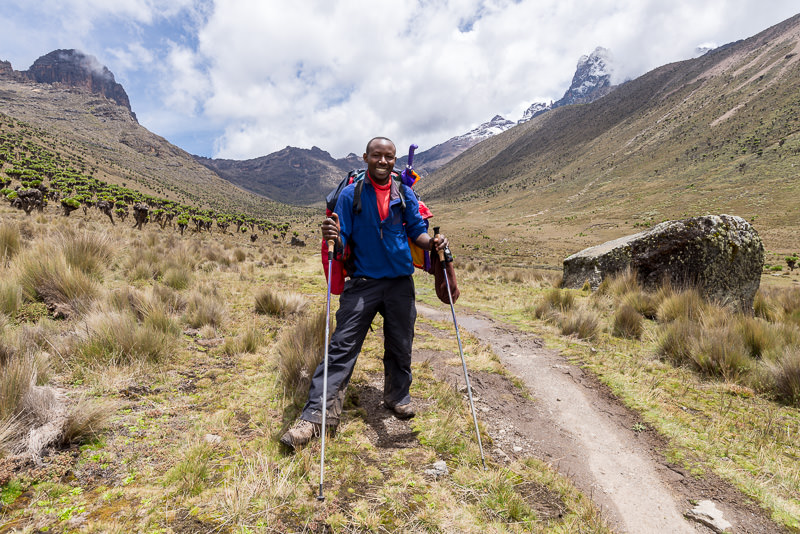
Here’s John in Sirimon Valley in the afternoon, after the rains stopped in the afternoon and the clouds broke up a bit. Batian, the highest point of Mount Kenya, can be seen to the rear.
The weather cleared by the end of the day for a few dramatic looks back at Sirimon Valley, after our arrival at Shiptons Camp.
Looking down Sirimon Valley from Shiptons Camp in the late afternoon.
My room full of bunks at Shiptons Camp was completely empty aside from myself due to low numbers of trekkers on the mountain.
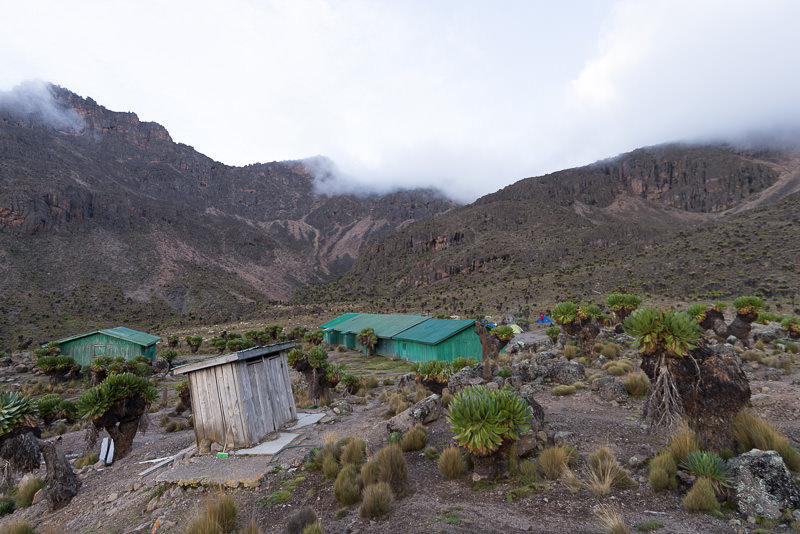
Shiptons Camp. Near building is a pit toilet (called “long drop toilet” in Kenya). I slept inside the near green building, which has simple bunks, toilets, a simple kitchen area and access to water.
Shiptons Camp bedroom for one.
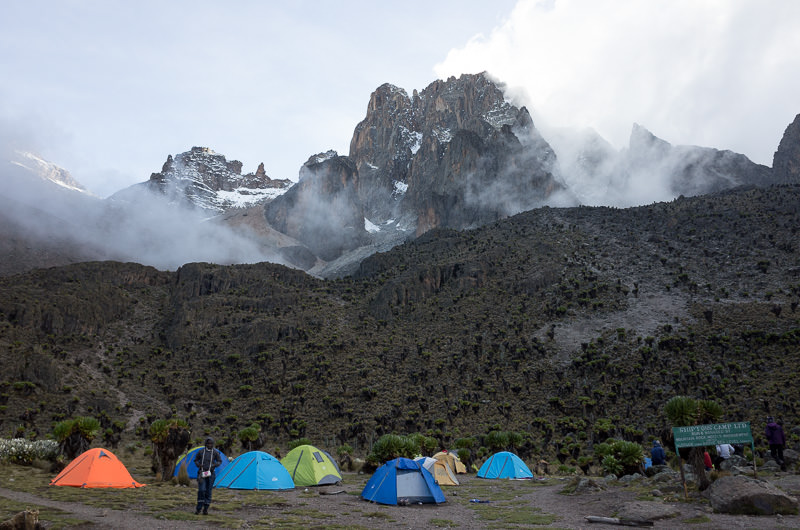
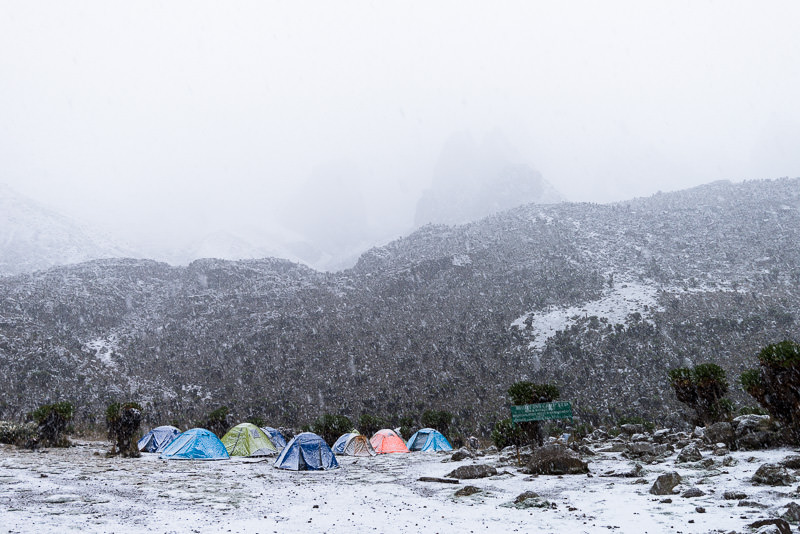
Campers at Shiptons Camp, below Batian peak.
Day 3: Acclimatization day at Shiptons Camp
- Relaxed itinerary. Short mid-day hike to a ridge overlooking Shipton camp, otherwise just eating, sleeping, reading and enjoying the views.
We woke up to find that conditions had changed yet again, and snow was falling. After a late breakfast, our acclimatization hike took place in fresh white snow, which was really nice. The mountain looked like a completely different place!
Morning at Shiptons Camp.
Sirimon Valley after snow.
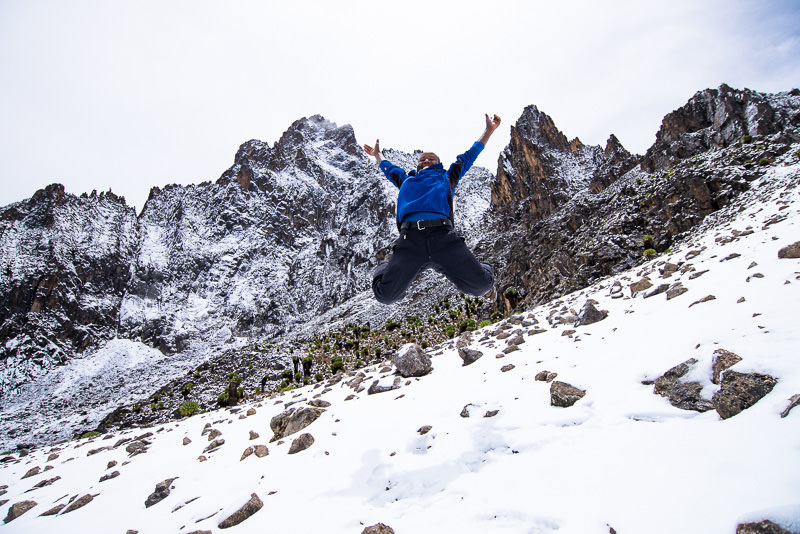
I think my guide, John may have been having as much fun as I was.
I spent the rest of the day reading my book, “Breakfast of Champions” by Kurt Vonnegut, and retired early given the next day’s plan (and the intense cold).
Day 4: Summit at Point Lenana at sunrise, return to Shipton Camp for late breakfast, then hike down to Old Moses camp
- 4:00 AM – leave Shiptons Camp
- 6:00 AM – summit Point Lenana (4985m) at sunrise
- 8:30 AM – return to Shiptons Camp for late breakfast
- 11:00 AM – leave Shiptons Camp, trek toward Old Moses Camp (via Likii North in our case)
- 4:30 PM – arrive at Old Moses Camp
My guide and I were the only two people to summit Point Lenana this day. We started in darkness, like you do if you really want to see any sunrise from any mountaintop. It was cold, but not ridiculously cold. We made good time on the way up – the snow was pleasantly grippy under my boots. This morning really felt like an adventure, and it was.
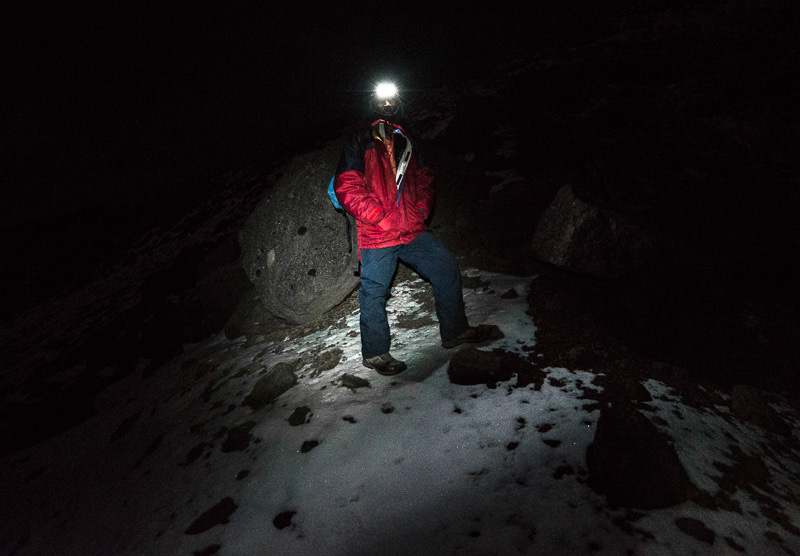
Don’t forget your headlamp. Your summit of Point Lenana may involve a bit of scrambling. Also: I took my trekking poles along, and wish I hadn’t – they got in the way a bit during scrambles.
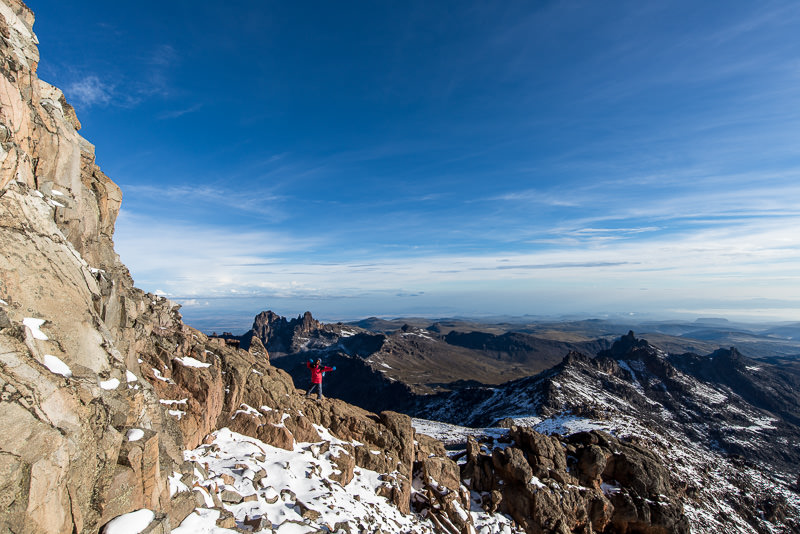
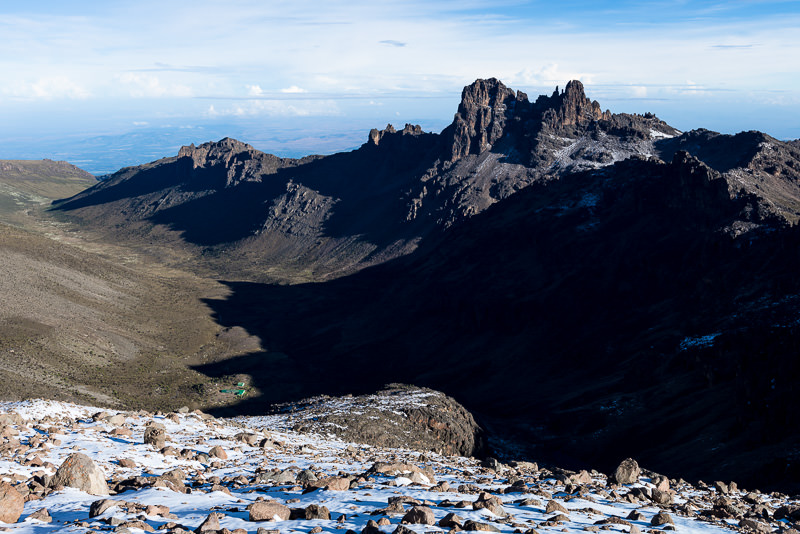
When we reached the summit, conditions were absolutely amazing: almost zero wind, clear skies dappled with clouds, and FRESH SNOW to trek on! The whole experience was very quiet, very personal. We couldn’t stop smiling. Lucky!
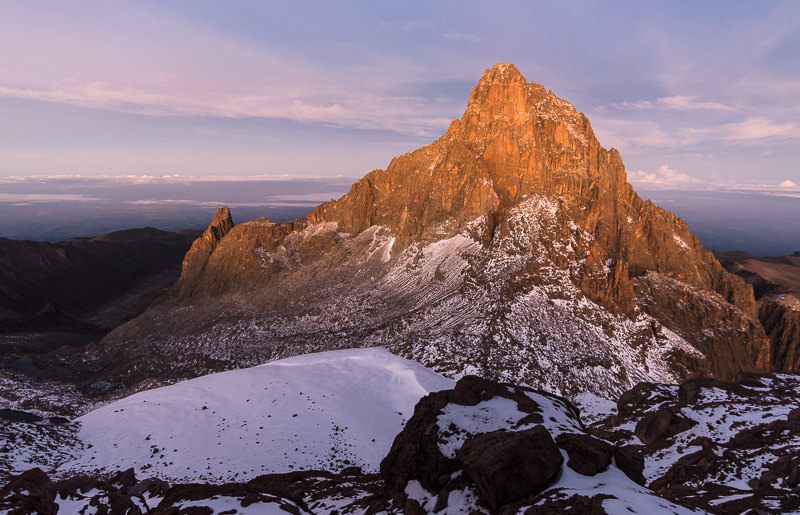
The colorful glow of first light illuminates Batian (5,199 m / 17,057 ft). Shot from Point Lenana (4,985 m / 16,355 ft).
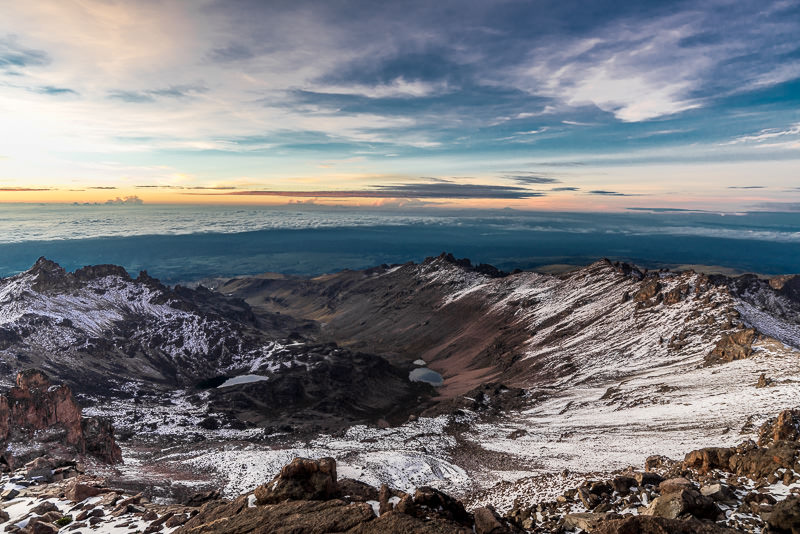
Looking to the south: deep valleys and an alpine lake. Mount Kilimanjaro is the tall hump you see on the distant horizon, just to the right of center. Amazing!
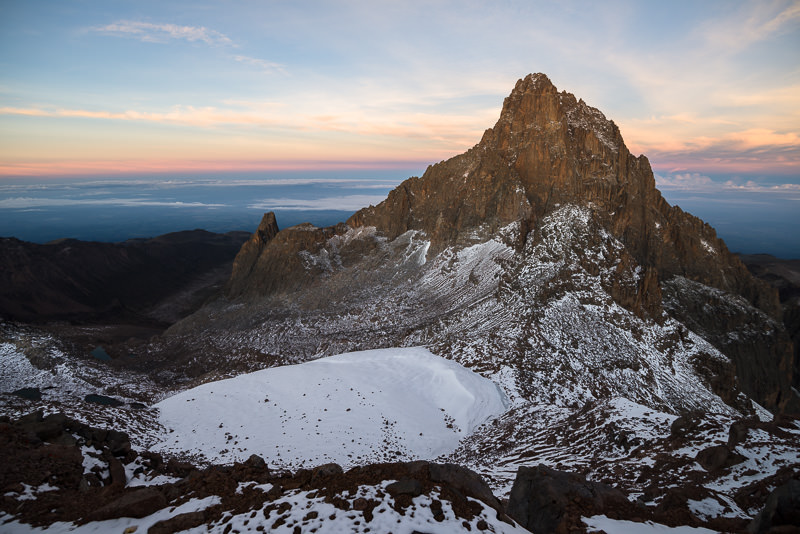
Another look at Batian, taken just 10 minutes after the previous view. The colors of the sky had completely changed by this point.
Heading back down to Shiptons Camp from our high point.
Sirimon Valley emerges from shadow. Shiptons Camp is the tiny green buildings between fingers of shadow.
The clouds swept in after breakfast, and the rains with them. Our hike down Sirimon Valley and back to Old Moses Camp via the Likii North trail was a particularly wet one.
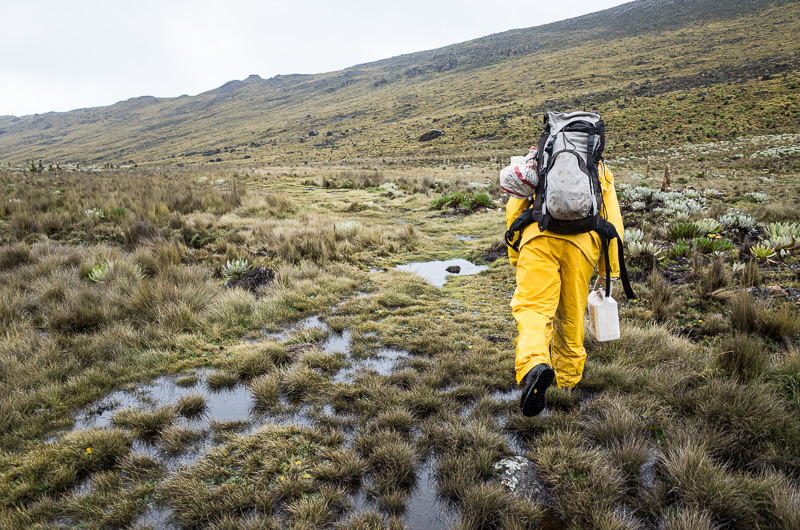
Our cook Steven slogs through Likii North, carrying fuel for the cooking stove by hand.
Based on my experience that day, I cannot recommend that you take Likii North trail in the rain. The majority of the “trail” becomes basically a marsh/creek when it’s raining – almost unrecognizable as a path! We slogged through this mess for around three hours and I found it impossible not to get thoroughly soaked in the process, despite rain gear and boots. It was just WET, and not particularly fun. At the beginning of the hike, it was kind of a game to hop between dry patches to avoid submerging your boot in water. By the end, I was so wet that I just stopped caring and would let my feet fall where they may. I couldn’t wait to get out of my wet gear when we arrived at Old Moses Camp that night.
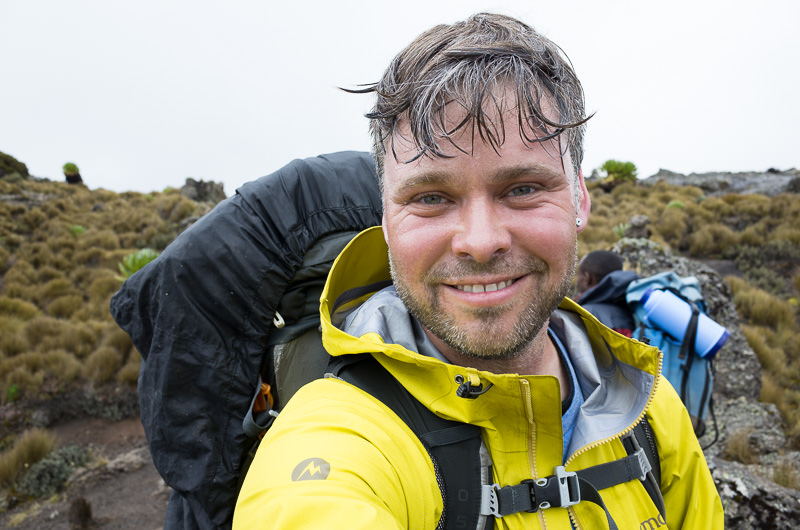
Soaked and cold and trying hard to smile on Likii North.
Day 5: Hike from Old Moses camp to Sirimon park gate, transit to Nanyuki by car, then transit back to Nairobi by bus
- 7:30 AM (or thereabouts) – leave Old Moses camp by foot
- 10:00 AM – arrive at Sirimon gate of Mount Kenya National Park, transit to Nanyuki by car
- 11:00 AM – arrive Nanyuki, transfer to a public bus for return to Nairobi
- 2:00 PM (or thereabouts) – arrive back in Nairobi
This was another pretty basic day with more transit than trekking. I was pretty tired and dirty by this point anyway, so I wasn’t irked about getting a shower in and a good night’s sleep in temperatures that were above freezing. Trek completed!
Thoughts on My Route and Itinerary
Five days is a pretty relaxed itinerary for trekking to Point Lenana. If you’re in good shape and have experience with trekking at altitude, I think you could probably summit Point Lenana in a 3-4 day trek without a problem. Ideas: maybe cut the altitude acclimation day, or perhaps insist on starting your trek from Nanyuki instead of Nairobi to save time, and there you go. Or, if you’re in no rush, just do it in five days like I did and let your brain unwind. Enjoy the mountains, why not!
As for having to hike Sirimon twice instead of visiting Chogoria: I would’ve liked to see Chogoria for sure, but electrical storms at elevation can be extremely dangerous, and my guide and I agreed that it wasn’t worth the risk. For independent trekkers: camp/lodge caretakers should have access to weather reports via radio or mobile phone – ask them for updates so you can stay safe on your trek.
Also: there are a wide variety of other routes you can take. Talk to your guide and do your research and pick what’s best for you. Sirimon-Chogoria is just one of the classics.
Climbing Mount Kenya: What it Costs
I paid all my daily park fees, food costs, lodging and personnel fees directly to my guide in one lump sum, so I won’t be parceling out daily costs by category. But this will give you an idea of what it costs to do a simple guided trek on Mount Kenya with a guide and cook, with sleeping arrangements in lodge bunks each night.
Guide/Cook/Food/Lodging costs:
10,476 KSH ($102.66 US) per day, x5 days, for a total of 52,380 KSH.
Trekking costs should land at around $85-100 US per day. Mine went up slightly to the daily figure you see above due to paying in Kenyan shillings due to slightly inflated exchange rates at the Mount Kenya National Park gate. It’s ok. But if you want to save a bit of money, try paying your trekking costs in US dollars.
These costs included everything aside from my equipment/clothing, and tips for my guide/cook after the trek (which are basically mandatory and expected, so you know!). I had no incidental costs on the mountain. I think you can buy beers with additional personal money at Old Moses Camp if you’re interested, but I just didn’t feel the need at the time.
Tipping costs:
1,900 KSH ($18.62 US) per day, x5 days, for a total of 9,500 KSH.
This broke out to 1200 KSH/day for my guide, 700 KSH/day for the cook. These numbers aren’t hard and fast, but they were enough to make my guide and cook happy. Personally: the last thing I want to do after a positive experience is sully my memories of those days by pissing off my team at the end (via poor tipping), so I usually go a bit above what’s necessary.
These tipping numbers only reflect my outlay of cash for a solo trek with a guide and cook. If you have a bigger team, a longer/shorter itinerary, or a bigger group of backpackers with which to split tipping, you may need to recalculate these costs. I recommend discussing recommended tipping amounts with your guide and trekking buddies prior to leaving for the trek so there are no surprises on either side.
Also: be sure to carry enough cash that you can tip out immediately after the trek, at the park gate. There won’t be an ATM there.
Total Expenditures:
61,880 KSH / $607.98 US total (12,376 KSH / $121.60 US per day).
How do these costs compare to those incurred for Mt Kilimanjaro treks?
If you’re dying to climb a tall mountain in Africa (like I was), Mt Kenya is WAY cheaper than going up Kilimanjaro. As of 2015/2016, I don’t think you can really do Kilimanjaro for less than $1000 US – and a safer bet is probably between $1200-1500 US in total. Crazy, right? This was no small part of my motivation for climbing Mt Kenya INSTEAD of Kilimanjaro.
Honestly, I’d still like to go up Kili at some point. But the insane costs are definitely a huge deterrent for me.
Also on a comparative level between the two mountains: I’ve heard and read that Mt Kenya is generally prettier trek and all around prettier mountain than Kilimanjaro. I can’t substantiate this as I haven’t trekked on both. But Mt Kenya was pretty darn beautiful, all said and done.
How do the costs of climbing Mount Kenya compare to trekking elsewhere in the world?
Honestly, I found trekking in Mount Kenya National Park to be noticeably more expensive than I’ve experienced in places like Guatemala, Poland, and even in national parks in the US. If you’re looking for the most economical trek in the world, this isn’t it. But if you’re in Kenya and want to go trekking, this is probably still your best option.
This level of cost matched up pretty well with my other experiences in east Africa: if you want to do touristic activities, you’re going to pay for them, period.
If you’re interested in trekking with my guide…
You can reach Mount Kenya guide, John Mukuruma Ndichu, at mukuruma@yahoo.co.uk. He’s a good dude and I’d be happy to trek with him again anytime (thanks John!).
Thanks for reading! Be sure to check out my other posts on travel in Kenya.